We will start by logging in to IRIS or by opening the RASTtk.app. If you are using the RASTtk.app you will need to log into RAST by typing the following command:
kbase-login username
The username and password are your RAST account username and password.
After you have logged in to IRIS you will be in your home directory. In the RASTtk.app, you will be in a bash shell on your computer and should navigate to a directory where you are comfortable working.
In order to demonstrate the submission of a batch of genomes we will start by making a new directory. Type:
mkdir ToSubmit
Please remain in the current working directory. We will populate "ToSubmit" momentarily.
Next we will download the contig files for E. coli and B. subtilis from the Kbase central store into our current working directory. Type:
echo "kb|g.0" | genomes_to_contigs | contigs_to_sequences  > E_coli.contig
echo "kb|g.424" |genomes_to_contigs |contigs_to_sequences >B_subtilis.contig
Then we will will convert these to genome typed objects and place them into "ToSubmit". Type:
rast-create-genome --scientific-name "Escherichia coli K-12" --genetic-code 11 --domain Bacteria --contigs E_coli.contig > ToSubmit/E_coli

rast-create-genome --scientific-name "Bacillus subtilis 168" --genetic-code 11 --domain Bacteria --contigs B_subtilis.contig > ToSubmit/B_subtilis
Now we have two files called "E_coli" and "B_subtilis" which have been converted to genome typed objects and are waiting to be submitted. If you were annotating your own genomes, the process would be the same. You would first need to convert your contigs in fasta format into genome typed objects with the appropriate metadata. It is the directory of genome typed objects that is then sent to the RAST server.
Now we will submit the entire directory, "ToSubmit" to be processed by RASTtk. This command uses the RASTtk default pipeline.
rast-process-genome-batch ToSubmit
This command returns a job id, which you should save. Mine is: 9f0d6d9a-c686-4b55-af6f-e0df59b0bb01
You can query the status of your job by using the command rast-query-genome-batch . Try it:
rast-query-genome-batch your job id
If your job is running you will get a response from the server that looks like this:
kb|g.220035	in-progress	2014-07-29T08:48:36.733-05:00	0001-01-01T00:00:00Z
kb|g.220034	in-progress	2014-07-29T08:48:36.758-05:00	0001-01-01T00:00:00Z
If your job is completed you will get a response from the server that looks like this:
kb|g.220035	completed	2014-07-29T08:48:36.733-05:00	2014-07-29T08:49:54.069-05:00	http://redwood.mcs.anl.gov:7078/node/751a0a8c-e13b-420d-84de-b2acdb79dd67?download	http://redwood.mcs.anl.gov:7078/node/dc44ef34-3855-42ea-bbb6-0294a5c91a47?download	http://redwood.mcs.anl.gov:7078/node/6e2be0e9-d3c9-4cc7-9eae-c821e30c2e01?download
kb|g.220034	completed	2014-07-29T08:48:36.758-05:00	2014-07-29T08:50:09.486-05:00	http://redwood.mcs.anl.gov:7078/node/f295435a-247f-45e6-87a2-772915561759?download	http://redwood.mcs.anl.gov:7078/node/d7c7ff6f-7ae4-48a2-aea3-11afe89a1805?download	http://redwood.mcs.anl.gov:7078/node/a7abccc6-1534-42b1-abbc-51ae71390907?download
We will create a new directory for the output of our RASTtk job. Type:
mkdir Output
When your job is completed, you can download it into the directory "Output" by typing:
rast-download-genome-batch your job id Output
This will download an annotated genome typed object for each genome.
Navigate to the Output directory by typing:
cd Output
if you type,
ls
You will see the contents of the output directory.
B_subtilis.gto
B_subtilis.stderr
B_subtilis.stdout
E_coli.gto
E_coli.stderr
E_coli.stdout
The files with the file extension, ".gto" are the annotated genome typed objects and the ".stderr" files provide a record of what annotation steps the RAST server performed. The .stdout file reports the temporary directory where the computation was performed one the server.
Finally, we can convert the genome typed objects to the format we desire by using rast-export-genome. For instance, I will convert the E. coli genome to a genbank file by typing:
rast-export-genome genbank < E_coli.gto > E_coli.gbk
That's all there is to it. Running the default RASTtk pipeline in batch mode centers around the commands rast-process-genome-batch and rast-download-genome-batch. The most difficult parts are creating the initial directory of genome typed objects and and the conversion of the downloaded genome typed objects into useful output using "rast-export-genome". When you are annotating a directory with many genomes it may be necessary to write a script that does this pre- and post-processing for you.
If you are still in the directory "Output/", please move back a level by typing,
cd ../
To demonstrate a custom batch mode submission, we will reannotate the E. coli and B. subtilis genome typed objects that we originally put in the "ToSubmit" directory. We will customize this submission by adding the prophage finder, PhiSpy.
Customizing a batch submission is nearly the same process as a default batch submission except that that it requires that you submit a special file declaring the steps of the custom pipeline that you wish to run. In order to do this, we use rast-process-genome-batch and we provide the workflow file document using the --workflow flag.
Please click the link below to look at the file that we are about to use. Notice that it contains a field called "stages" under which every every step is declared with a key called "name". Special program options such as "condition" and "paramaters" can also appear in this file under each named step. Notice that at the bottom of the file one of the named steps is "call_features_prophage_phispy".
A Sample Workflow FilePlease download this file by right clicking (or control-clicking) the link. We will name the file Workflow.txt. Then save it to your current working directory. If you are working in IRIS you should upload it to your working directory after you have saved it on your computer.
Now lets submit the custom annotation job. Please type:
rast-process-genome-batch --workflow Workflow.txt ToSubmit
You can check the status of your job with rast-query-genome-batch the same as before.
mkdir CustomizedDownload the genome:
rast-download-genome-batch your-job-id Customized
If you look at the new directory, it will have the same file names as before.
Now we will export a genome:
rast-export-genome feature_data < Customized/E_coli.gto >E_coli.tbl
Notice that new file contains the prophage calls.
If generating a RASTtk workflow document seems unpleasant to you, then you're in luck. It is possible to generate a workflow document using the RAST website.
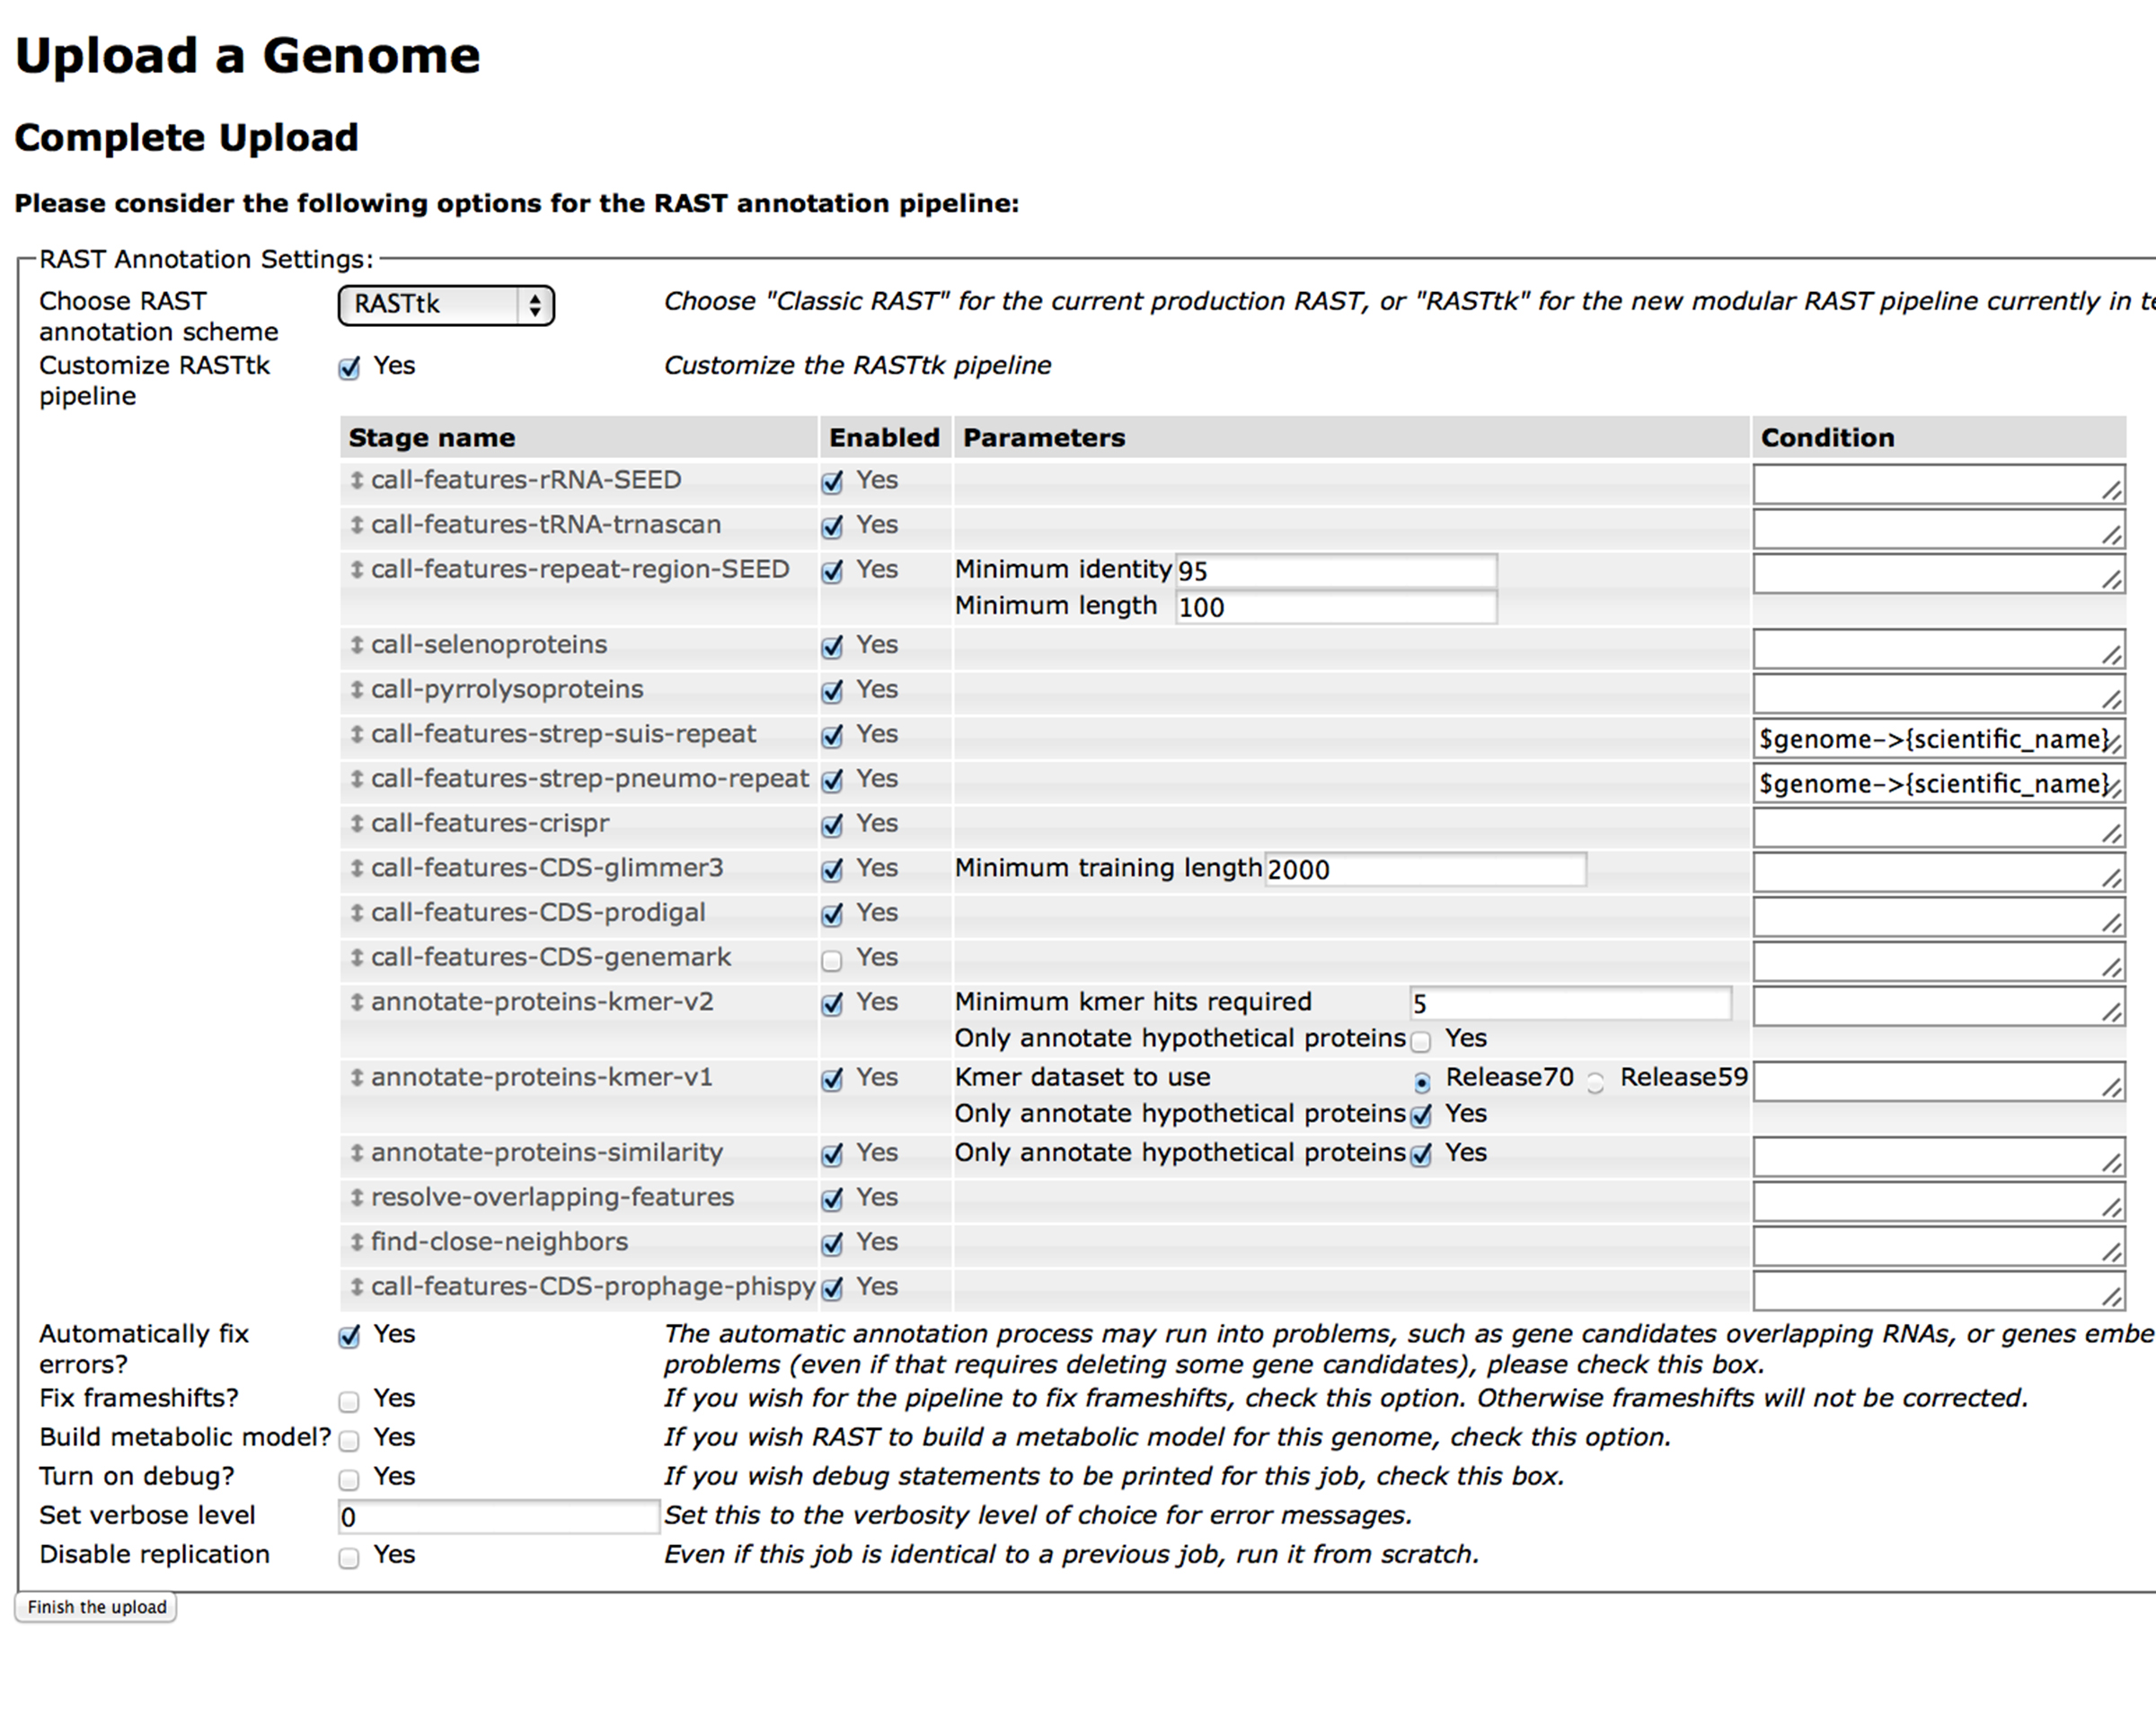
If you submit a genome on the RAST website using the RASTtk option, and you select "Customize RASTtk pipeline" it will bring up a table of options that looks like this:
You can select from the available steps that you want to have in your custom pipeline and click "Finish the upload". When you click, "View Job Details", You will see a page that looks like this:
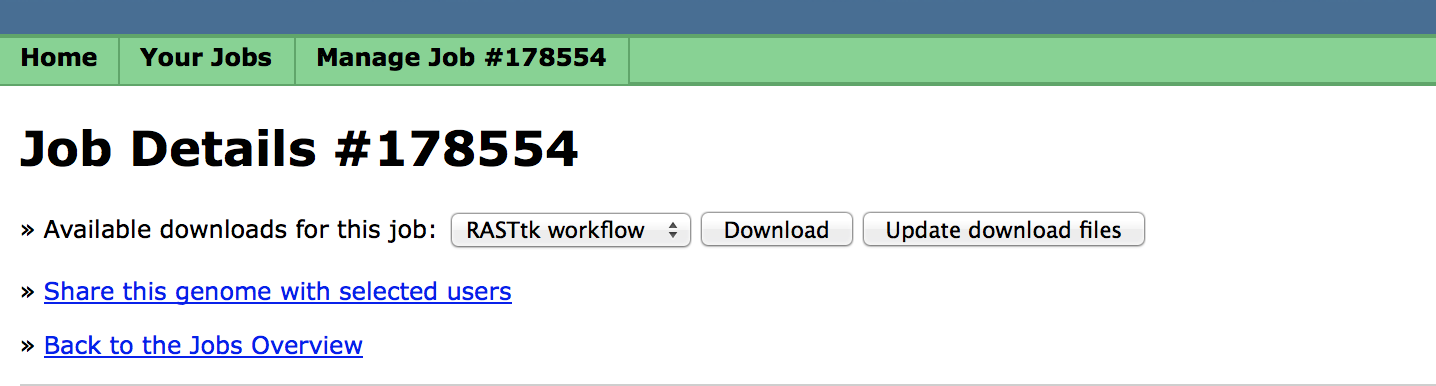
The workflow file is available by clicking the "Download" button.